はじめに
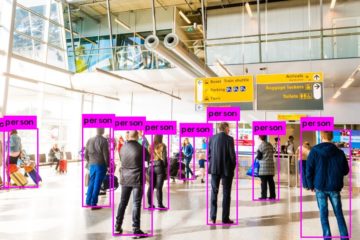
トラッキングとは簡単に言うと、カメラに写っている対象のオブジェクトを追跡して行くことです。マシンビジョンの世界では人間の行動解析や交通システム等で使用されている技術です。
実は昔、GOTURNはOpenCV3.2で試してみたのですが、その時はバグがあってうまく動きませんでした。
先日、既存のトラッキング手法プレビューしていて、ふとGOTURN思い出したので、今度はOpenCV3.4で試してみます。
実行環境
実行環境は以下の通りです。
C++
OpenCV: 3.4 + OpenCV_Contrib 3.4
OS: Ubuntu16.04
CPU: corei7-7700K
OpenCVは各自の環境に合わせてインストールしてください。
Pre-Trained モデルの入手
これはOpenCV-extraと言うモジュールの中にあります。
https://github.com/opencv/opencv_extra/tree/c4219d5eb3105ed8e634278fad312a1a8d2c182d/testdata/tracking
4つのZipファイルとファイルをgoturn.prototxtダウンロードします。
その後、以下のコマンドでZipファイルを1つに統合します。
cat goturn.caffemodel.zip* > goturn.caffemodel.zip
そして、ZIPファイルを以下のコマンドで解凍します。
unzip goturn.caffemodel.zip
goturn.caffemodelとgoturn.prototxtは実行フォルダに移動してください。
実行
顔をトラッキングした結果です。
うまく、トラッキングしていますね。
GOTURNの問題として、複数のトラッキングが出来ません。また、オクルージョンに対応していないので、木や建物でオブジェクトが遮られるとうまくトラッキング出来ないことがあります。
しかし、それ以外の場合は非常にロバストなトラッキングが行えます。
ソースコード
今回のデモのソースコードです。
|
1 2 3 4 5 6 7 8 9 10 11 12 13 14 15 16 17 18 19 20 21 22 23 24 25 26 27 28 29 30 31 32 33 34 35 36 37 38 39 40 41 42 43 44 45 46 47 48 49 50 51 52 53 54 55 56 57 58 59 60 61 62 63 64 65 66 67 68 69 70 71 72 73 74 75 76 77 78 79 |
#include <iostream> #include <opencv2/opencv.hpp> #include <opencv2/tracking.hpp> #include <opencv2/core/ocl.hpp> using namespace cv; using namespace std; // Convert to string #define SSTR( x ) static_cast< std::ostringstream & >( \ ( std::ostringstream() << std::dec << x ) ).str() int main() { // Create a tracker Ptr<Tracker> tracker = TrackerGOTURN::create(); // Read video VideoCapture video("/path/to/video"); // Exit if video is not opened if(!video.isOpened()){ cout << "Could not read video file" << endl; return 1; } // Read first frame Mat frame; bool ok = video.read(frame); // Define initial boundibg box Rect2d bbox(287, 23, 86, 320); // Uncomment the line below to select a different bounding box bbox = selectROI(frame, false); // Display bounding box. rectangle(frame, bbox, Scalar( 255, 0, 0 ), 2, 1 ); imshow("Tracking", frame); tracker->init(frame, bbox); while(video.read(frame)){ // Start timer double timer = (double)getTickCount(); // Update the tracking result bool ok = tracker->update(frame, bbox); // Calculate Frames per second (FPS) float fps = getTickFrequency() / ((double)getTickCount() - timer); if (ok){ // Tracking success : Draw the tracked object rectangle(frame, bbox, Scalar( 255, 0, 0 ), 2, 1 ); }else{ // Tracking failure detected. putText(frame, "Tracking failure detected", Point(100,80), FONT_HERSHEY_SIMPLEX, 0.75, Scalar(0,0,255),2); } // Display tracker type on frame putText(frame, trackerType + " Tracker", Point(100,20), FONT_HERSHEY_SIMPLEX, 0.75, Scalar(50,170,50),2); // Display FPS on frame putText(frame, "FPS : " + SSTR(int(fps)), Point(100,50), FONT_HERSHEY_SIMPLEX, 0.75, Scalar(50,170,50), 2); // Display frame. imshow("Tracking", frame); // Exit if ESC pressed. int k = waitKey(1); if(k == 27){ break; } } } |
まとめ
正直、実際の現場でトラッキングを行う場合にはGOTURNでは十分ではありません。
と言うのも、人間や車のトラッキングは複雑な環境(木や建物によってオブジェクトが見えなくなる箇所がある)で行うことが多く、対象も複数になる場合がほとんどだからです。
弊社でも、YOLOやSSDで物体認識した後に独自のトラッキング手法を組み合わせて実際の現場で使用しています。
しかし、手軽にNNベースのトラッキングを試したい場合には良い選択ではないでしょうか。


2件のコメント
Silence · 2018年11月8日 4:53 PM
Hi,I want to know how to run the code. Please can you tell me how to compile and run to get the result as you show.
sosogu · 2019年4月11日 8:57 AM
Hi Silence, Thank you for your comment and so sorry for late reply.
First you have to download the pre-trained model from here.
https://github.com/opencv/opencv_extra/tree/c4219d5eb3105ed8e634278fad312a1a8d2c182d/testdata/tracking
then, marge the 4 zip files to 1 using following command.
cat goturn.caffemodel.zip* > goturn.caffemodel.zipand unzip it.
unzip goturn.caffemodel.zipyou have to move the goturn.caffemodel and goturn.prototxt to your run folder.
then, just use above code to run. enjoy the trucking!